
Managing your domain authentication to send mail with Mailchimp or similar mail providers can sound like a daunting task, but it’s a relatively simple process. Hopefully this article will hold your hand through the experience and allow you to send mail via external websites, quickly and easily.
Taking Mailchimp as an example, you’ll typically be given two pieces of information to add, DKIM information and SPF information as shown below.
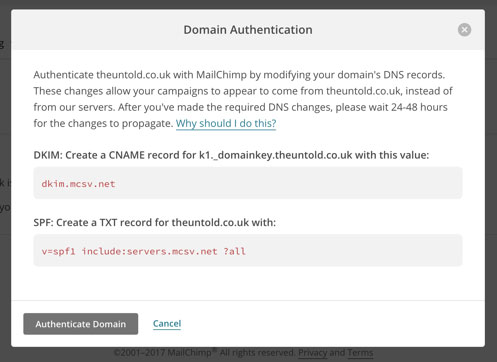
DKIM (DomainKeys Identified Mail) allows you to approve a third party organisation to take responsibility for a message that is in transit. The third party’s reputation (Mailchimp in this case) becomes the basis for evaluating whether to trust the message for further handling, such as delivery. On a technical level, DKIM provides a method for validating a domain name identity that is associated with a message through cryptographic authentication.
The SPF record is DNS (Domain Name Service) information that identifies which mail servers are permitted to send email on your behalf. The main purpose of adding an SPF record is to prevent spammers from sending messages with forged FROM addresses at your domain.
Adding a DKIM Record in cPanel
How do I add a DKIM record in cPanel or WHM?
To add a DKIM CNAME record, you’ll need to log in to your cPanel and find the Zone Editor section. It will look something like the image below, depending on which cPanel theme you are using.
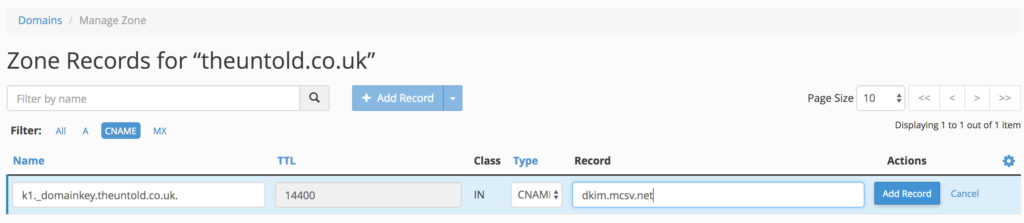
You’ll need to add the information exactly as per the image, replacing the relevant NAME and RECORD data with your own. Ensure the TYPE is set to CNAME and click Add Record. That’s all you need to do.
Adding a SPF Record in Cpanel
The final piece of the puzzle is the SPF record and for this you’ll need to use the Email Authentication section of cPanel.
In there you should see the following information – again, it may look slightly different depending on your cPanel theme.
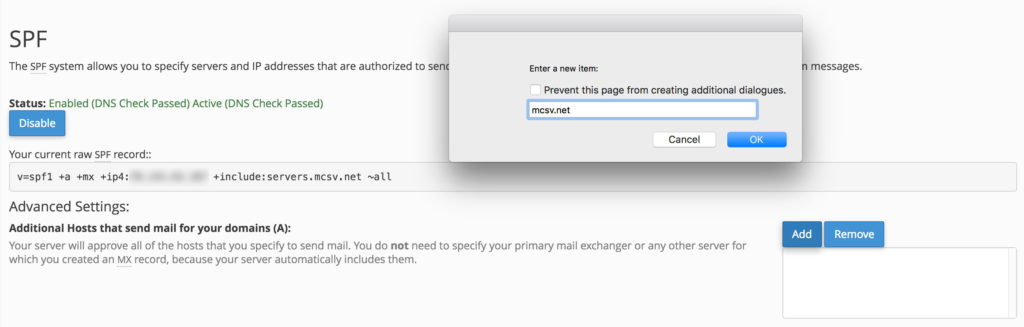
Simply click the ADD button, bottom-right in the screenshot and a dialogue will pop up. In the dialogue, you need to enter the domain name, and nothing else, and click the OK button. You should then see your current RAW SPF record below. Don’t worry if it doesn’t look the same as the information Mailchimp provides, it should work just fine.
In Summary and a Footnote
Adding these pieces of information can be essential to guarantee mail delivery, and also to avoid finding yourself on spam blacklists. The steps are relatively simple, but if you’re unsure of what you are doing, it’s always best to contact your web host for further assistance. After all, it’s what they are there for.
Also be aware that these changes may take a while to propagate. Most domain and ISPs suggest to allow 24-48 hours for this to update correctly, but it’s typically much quicker, in some cases almost instant.
Happy mailing!
Thanks Warren Chandler. Works perfectly. Best AJ.